 |
 |
What's the point
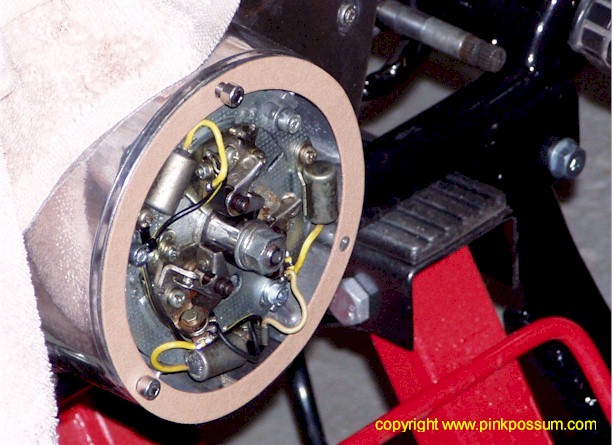
I had that heavy GT750 motor in the frame and assembly was proceeding nicely up to the points where I tried to set the points. Not having set points in over a decade, my technique was more than a little rusty.
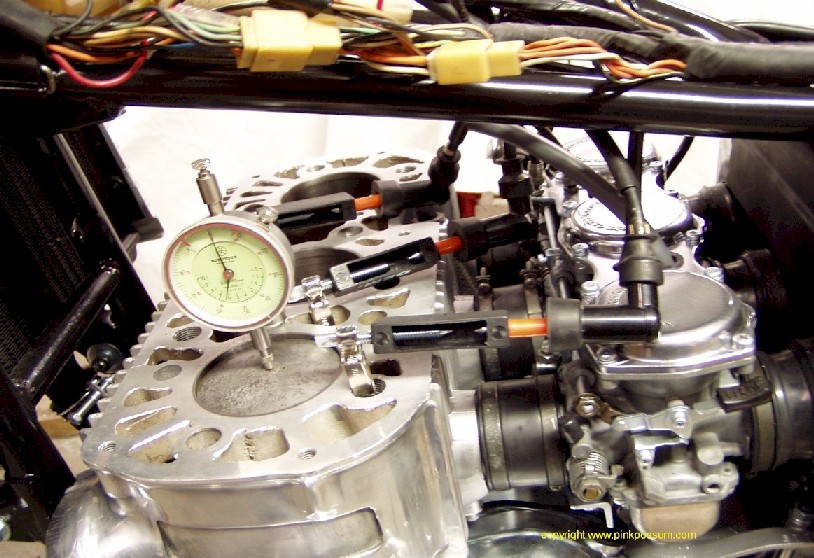
The dial gauge was rigidly mounted to the block to read piston position, a good set of feeler gauges and enough electrical test equipment. The problem was accurately recording the point at which the points opened. In addition, relatively small changes to poinst gaps made relatively large differences to timing.
After an hour or two of frustration I cried enough and decided it was time to move to Plan B - An electronic pointless system.
Sources
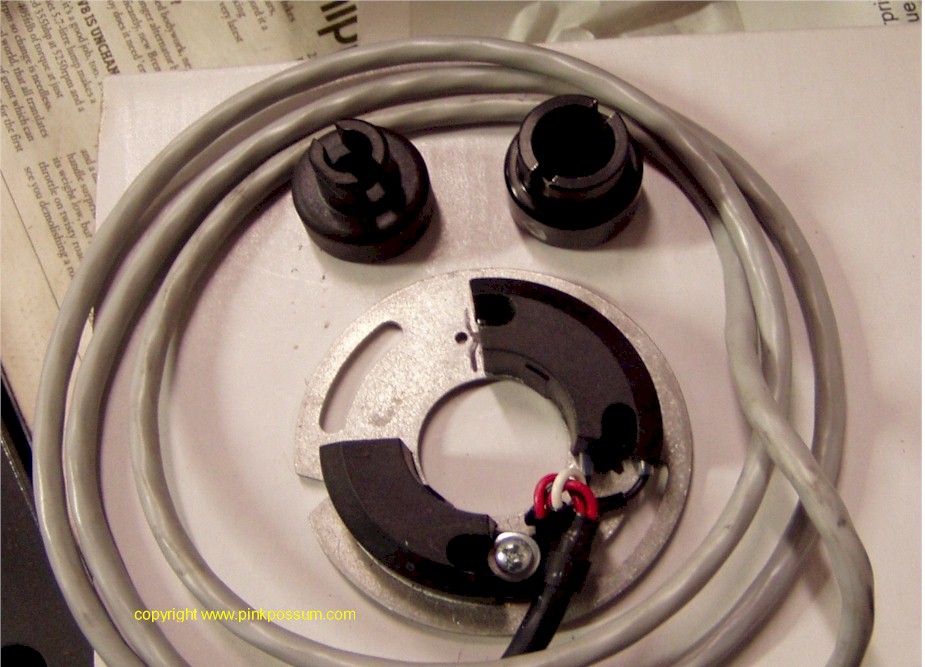
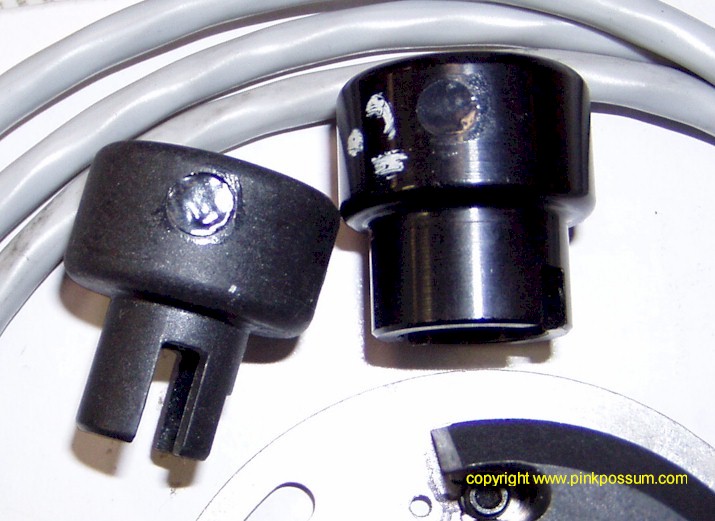
I started with a new Dyna S made to fit a Harley. The reason is simple - it was the cheapest unit on ebay when I was looking. In the picture I have placed two rotors. The one on the left is plastic, very nice, one magnet, perfect, but the bore is too small. the one on the right is Aluminum, has a bore which is 2mm too large and has two magnets.
 |
Of course a GT730 has 3 cylinders so you will need one extra pickup unit. Fortunately I happened to have a spare one that came off one of our Honda CB160 racers. The 160 has a 360 degree crank, so it only needs one pickup on the crank end to fire a double coil once per revolution.
So that left a spare module. Second hand (used) Dynas are reasonably cheap on ebay. No need to pay retail price for this stuff.
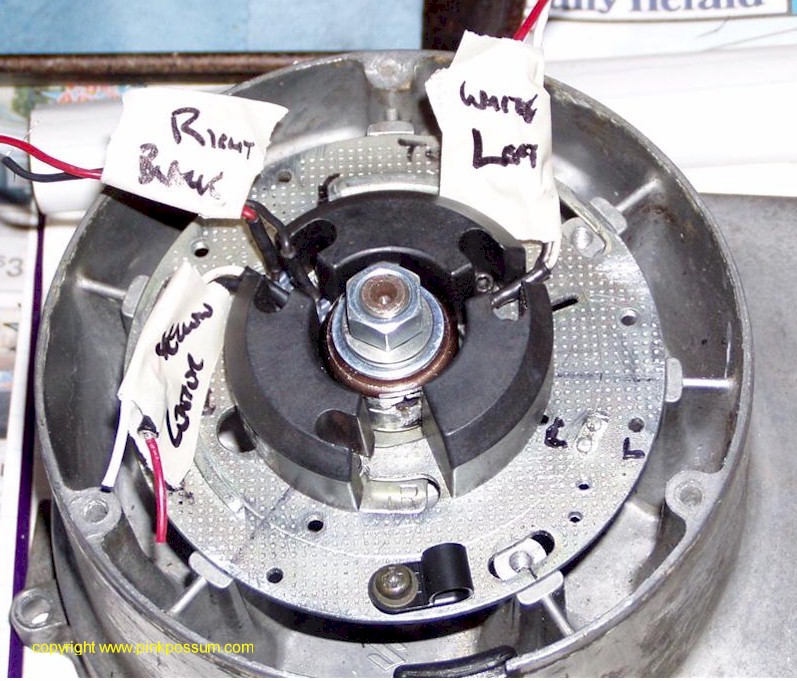
Mounting plate
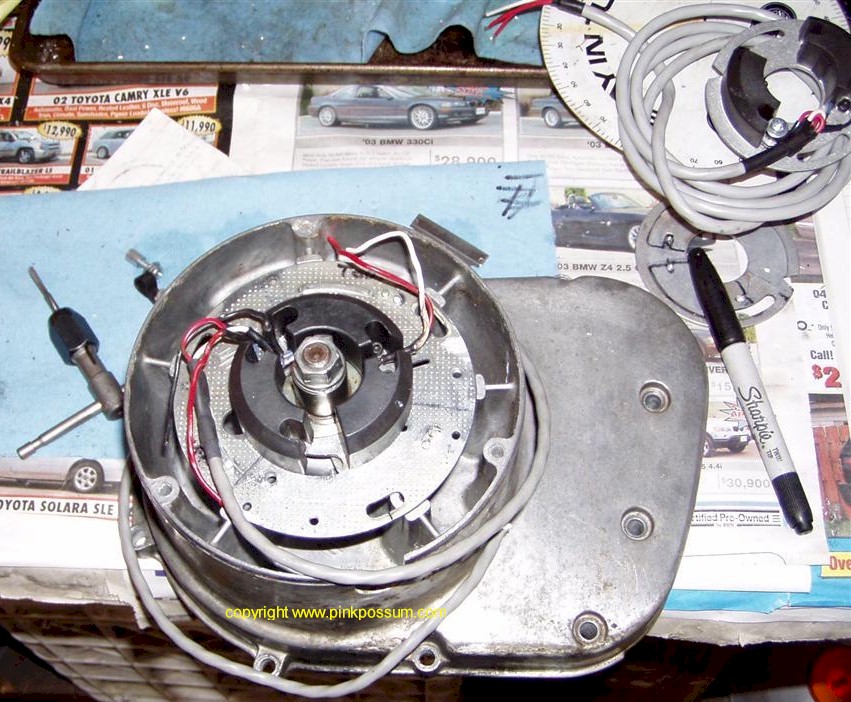
The first job was to move one of the pickups from the HD V twin position to a point 120 degrees from the first. Then the third pickup was added a further 120 degrees around.
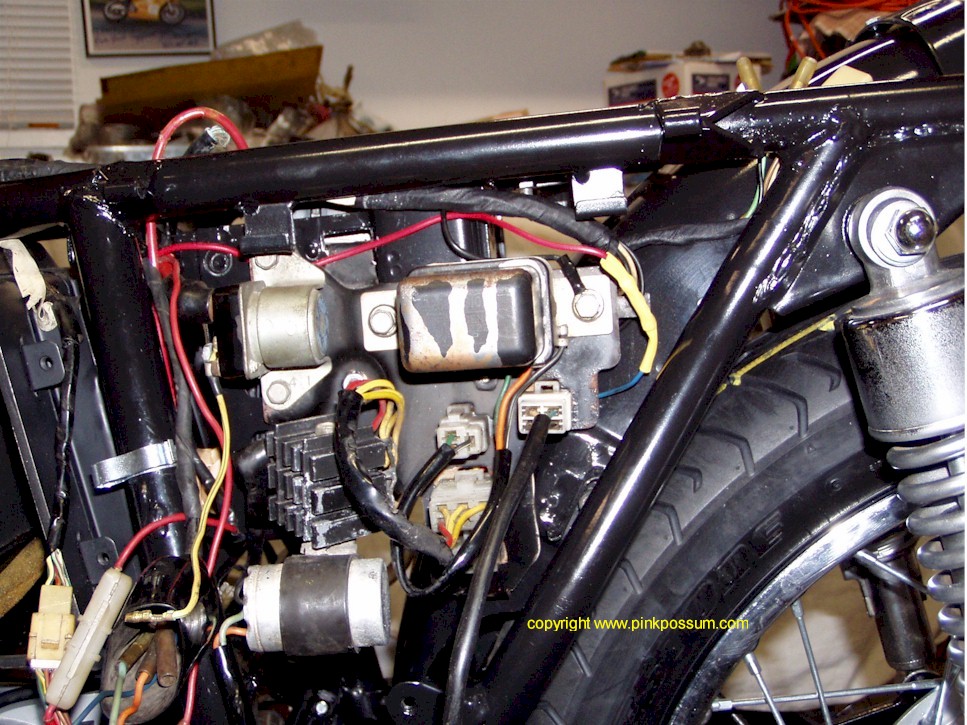
Having a spare side cover made things really easy in terms of access and visibility. It isn't strictly necessary, but it was so much easier to look at it on the bench versus lying on the floor to see it all in place.
 |
So far so good, but a HD points plate is way different to a GT750 plate. There were several possible solutions.
One possibility was to mount the HD plate onto a stock Suzuki points plate. That somehow, didn't seem like a very good idea, but it would have been the simplest solution.
Or I could have had a custom mounting plate machine up. That would be the most elegant solution, but most expensive. For people with lathe in the garage or who can get parts made by buddies, this is the way to go for that super trick look.
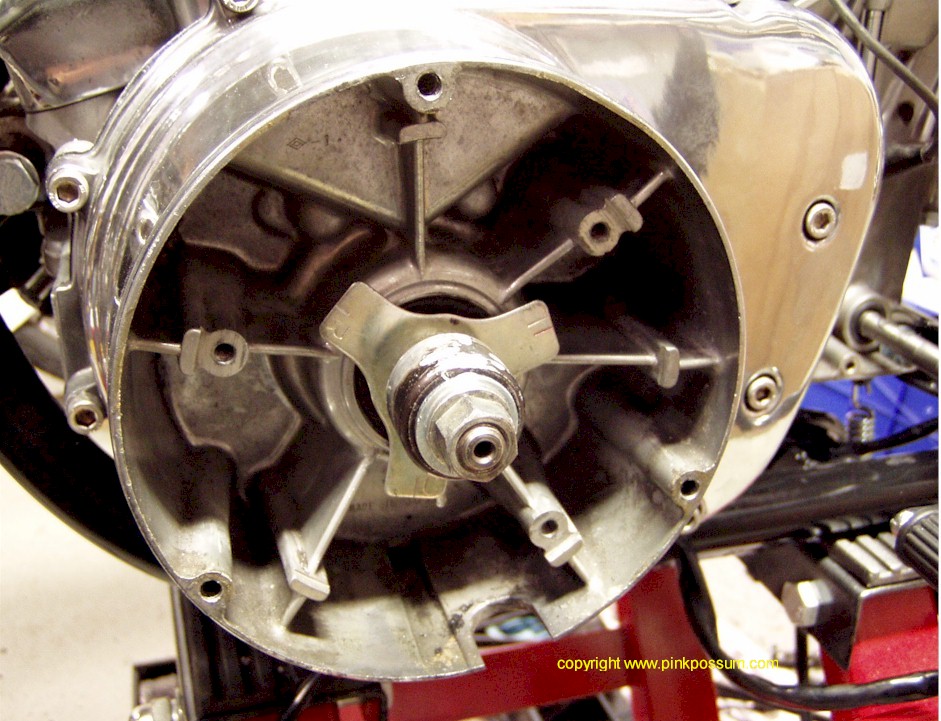
The third option was to mount the pickups straight onto a stock Suzuki GT750 mounting plate. And that is what I chose to do.
 |
 |
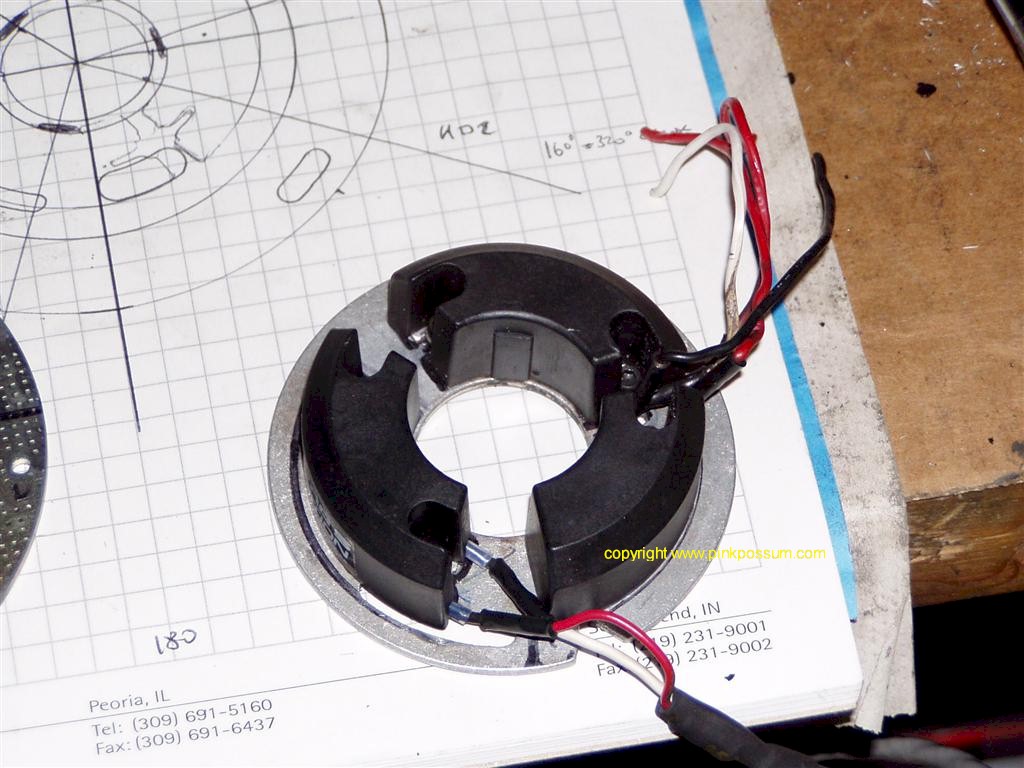
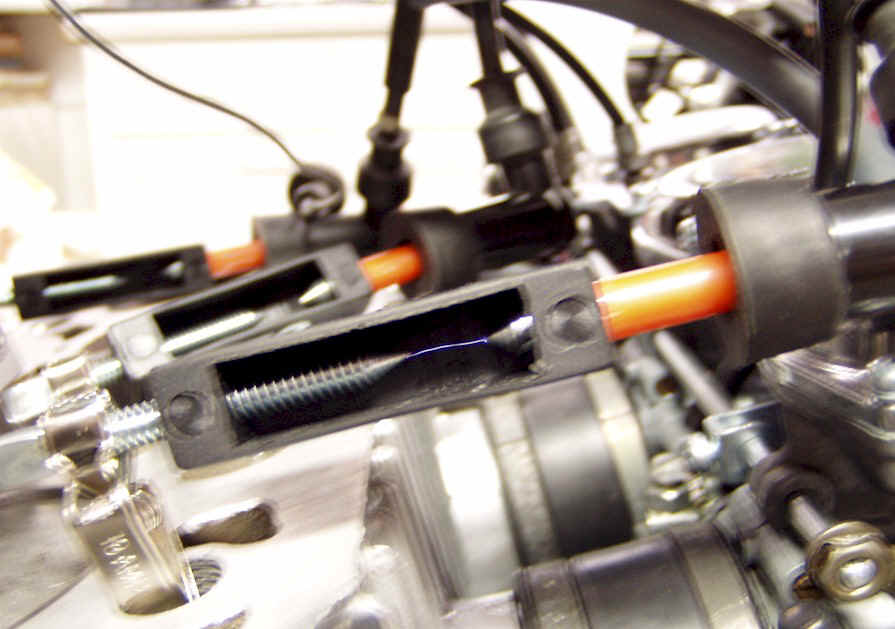
Transposing the new mounting hole positions to the GT mounting plate isn't difficult, but it took a couple of goes to get it right. Accuracy and attention to detail are essential because the pickups need to be within about 2 degrees of the right spot.
There isn't a whole lot of room to play with and two of the pickups are really close and their leads end up pointing past each other, so be very careful with wiring them or else they will fire in the wrong sequence.
Dyna S pickups have about 5 degrees of adjustability and we'll need all of that to fine tune the timing when it's all mounted.
 |
Rotor
Make sure you get an Aluminum rotor. If the rotor has one magnet, it's perfect, but most Dyna rotors have two magnets which is not what we need so take a micro torch and carefully, but quickly heat the rotor around one of the magnets. Within minutes the magnet will shoot across the room as the epoxy softens and air behind it expands and pushes it out.
The idea is to avoid slowly heating the whole rotor and risk losing both magnets, so I had to work quickly. Obviously that isn't such a great idea to try on a plastic rotor.
So now we have a single magnet rotor. All I had to do was to shorten the rotor and cutting a slot in the bottom to fit over the pin in the GT750 points shaft.
 |
 |
As you can see, the rotor is very used looking, but it's dimensionally fine and the magnet is where it's supposed to be. Besides, whose looking at what it looks like?
A more aesthetically pleasing alternate is to machine a new rotor, custom made for the job.
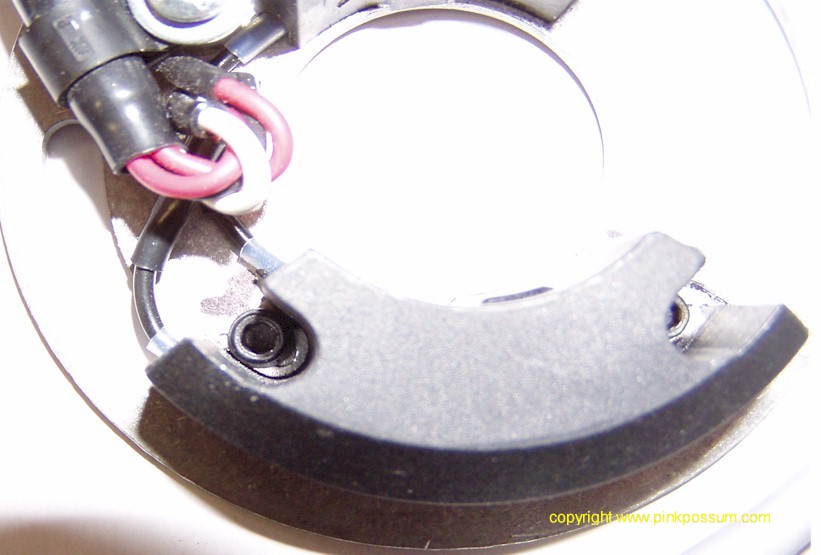
Wiring Loom
Wiring turned out to be simple. I took the stock points wire and that gave me three connections for the DYNA pickups. In addition I needed switch 12 volt power for each pickup.
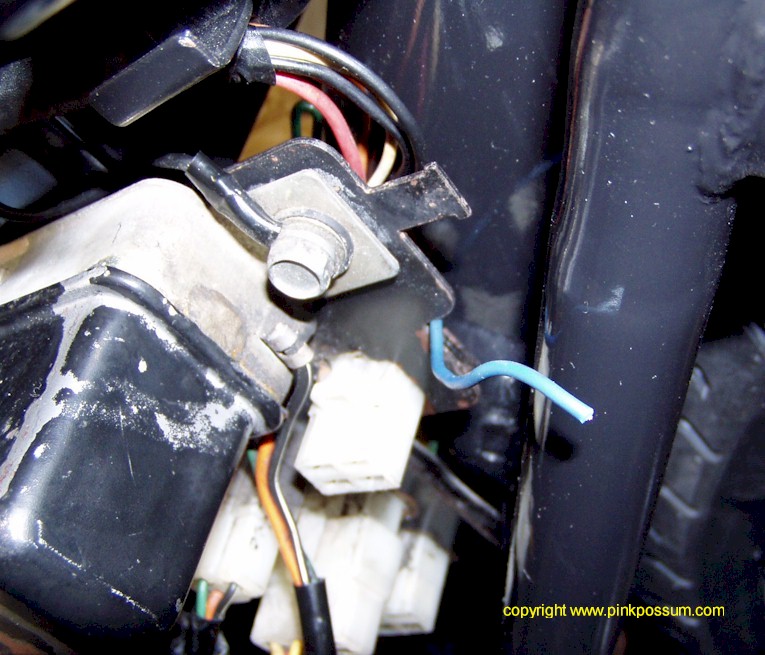
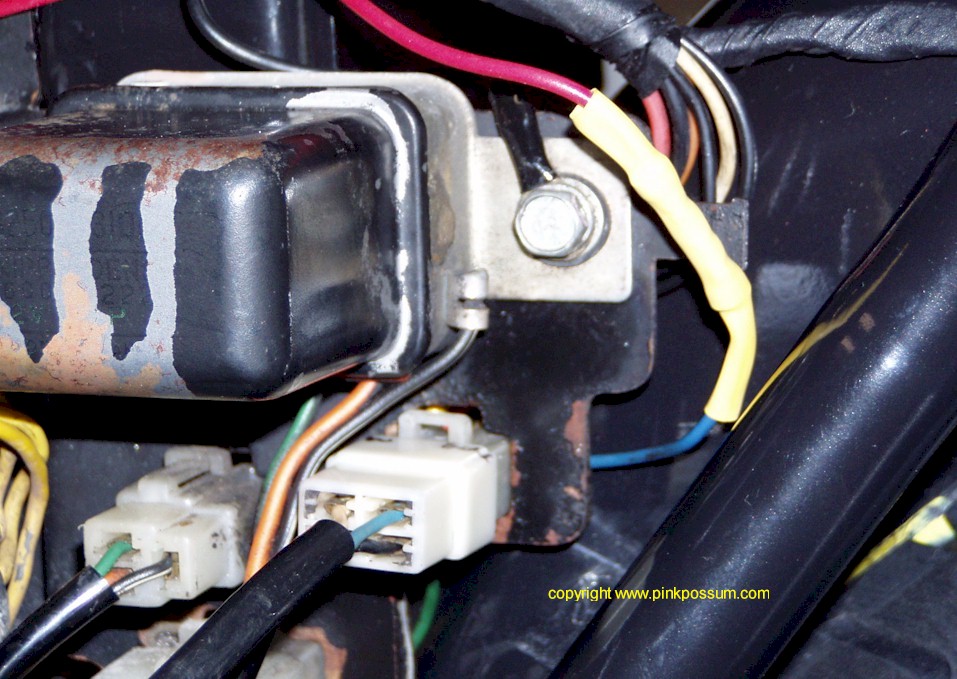
On GT750 Models without a Gear Indicator, used the 4th connection in the points loom is for the Neutral switch. Later models used a seperate blue wire, but the main loom still has a blue wire to the points lead junction block. It's the top right position. Later model points looms are only wired for 3 pins, the 4th position is empty.
Although that blue wire carries switched 12 volts, we can't just use it because it would leave the neutral light on all the time.
I was fortunate that I had an early style point lead with 3 leads in it so I made use of that extra wire. I cut the blue lead as far up into the main loom as I could get and then covered up the exposed end. Then I connected about a foot of red wire to the blue lead at the back of the junction block, which I then spliced into the orange lead to the rear brake switch. The rear brake switch was two leads, one is switched power (orange) and the other (white) goes to the light.
 |
 |
 |
At what used to be the points end, I split the blue lead into three red power feeds, by soldering three short red leads on and then taped it all up.
 |
If you have a late model GT, just run a 4th wire along the points loom, tape it up neatly and make a connection into the brake switch power supply.
Timing
There are two ways to time a DYNA S ignition.
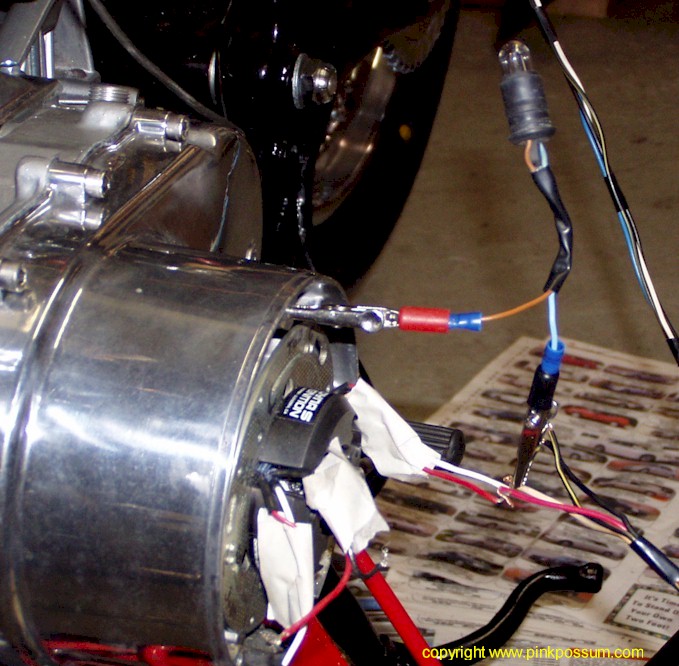
The first is to connect an indicator bulb between the output side of each Dyna module and ground. turn the motor forwards and when the light comes on, that is the firing point. Do not connect it to the power (red) lead or it will stay lit.
The other technique is simply to watch for the exact moment that the ignition fires. It is possible to do that by putting a spark plug into the plug cap and leaning it against the motor to ground it, and watching for a spark. the problem with that technique is that in air under no compression pressure, it doesn't take much power to fire a plug and it's not so easy to see the spark.
Granted it's stronger spark than with points, but there's a better way. I bought 3 cheap spark testers from our local Auto parts store for a couple of bucks each and opened the gap to about 10mm or maybe more. Now the spark is a fat blue streak which can be seen and heard, even in bright daylight.
Adjust the timing plate so that the left plug fires at the point that you want it to be - stock is 3.42mm BTDC. It is so easy to set this way, it's like falling off a log.
Repeat for cylinders 2 and three, adjusting the Dyna S pickups individually. Form then on if the timing needs to be changed for lower octane gas to for higher compression etc, the whole plate can be rotated and everything stays in synch.
 |
 |
 |
Time to burn
Here's a table of Timing figures for the GT750 in millimeters before TDC and Degrees, for center cylinder or with dial gauge mounted vertically above the pistons. Roughly speaking, 0.1mm equates to about 0.5 degrees. The GT750 Workshop Manual says timing should be set at 24 degrees +/-2 degrees.
22 degrees is 2.88mm BTDC and 26 degrees is 3.99mm. That is a huge range, which says as much or more about the low state of tune and low compression ratio, as much as it says anything about how hard it is to set points.
In general, the higher the state of tune, the more sensitive a motor is to timing changes.
|
Degrees BTDC |
mm BTDC |
|
18.0 18.5 19.0 19.5 20.0 20.5 21.0 22.0 22.5 23.0 23.5 24.0 (stock) 24.5 25.0 25.5 26.0 |
1.95 2.05 2.17 2.28 2.40 2.51 2.64 2.88 3.02 3.15 3.29 3.42 (stock) 3.56 3.72 3.87 3.99 |
On race motors it's not uncommon to hear racers trying to tweak timing by 0.05mm which is approx. 0.3 degrees. To put ignition timing into perspective, Let's work through the numbers for a GT750 at say 6,000 RPM.
6,000 RPM is six thousand revolutions in a minute or 100 per second. That means each revolution takes 1/100 seconds for all 360 degrees. if the ignition fires at say 20 degrees BTDC and peak combustion pressure is required at say 15 ATDC, that gives 35 degrees of burn before peak pressure or 35/360 of a revolution.
How long does that take? The calculation is (Fraction of a revolution) * (time per rev) in seconds. In our example:
35/360 * 1/100 seconds which equals 0.00097 secs. Roughly 1 thousandth of a second of peak burn time. Every degree too early, the pressure rise comes too soon and creates pumping losses as the rising piston pushes against the burning gases. Too late and the pressure doesn't build to its maximum soon enough and power is wasted.
At slow speed a 2 stroke motor needs more advance which in turn creates torque and acceleration. As engine speed rises, so does combustion chamber turbulence and flame speed. In a well designed, high performance 2 stroke, flame speed rises faster than engine speed and it's necessary to retard timing as speed goes up.
On slow revving motors in a low state of tune, with no squish band (GT750 for example), this is less of an issue, but the higher the state of tune, the more important timing and adjustability become.
For comparison a 2001 XCR800 Polaris can be tweaked to make about 200HP and it needs multiple timing maps and sensors, and it's considered to be fairly simple! What would they make of a GT750?
Short video of sparking with DYNA S ignition.
|