The following comments are designed for experienced mechanics who understand the principals involved and who take responsibility for their own work. This material has not been reviewed or approved by Suzuki Motors or its subsidiaries or related corporations. If you screw up it's your problem. Don't call us, all our lines are currently busy ignoring other customers in our Indian call center where all our employees try to sound like Americans.
Starter Rotor
The starter rotor is retained by a nut and lock washer onto the left end of the crankshaft. The crank end is tapered and it is necessary to break the Taper Lock in order to remove it.
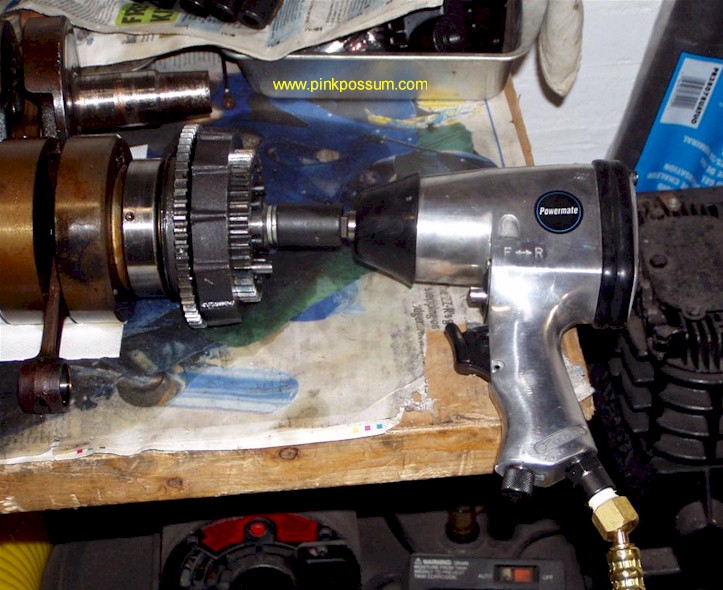
The first problem is getting that nut off the end of the shaft. Typical solutions include hard or soft objects jammed between gears, and motors in gear with the rear brake applied. The simplest way is to use a shock force rather than steady force. The easy way is to use an air wrench.
With an air tool, it is not necessary to clamp the crankshaft. Just hold it on the bench and press the trigger. It's amazing the way those things work. That way twisting the crank is avoided. A similar air tool is available form any hardware store or from mail order companies like Harbor Freight.
 |
Starter clutch puller
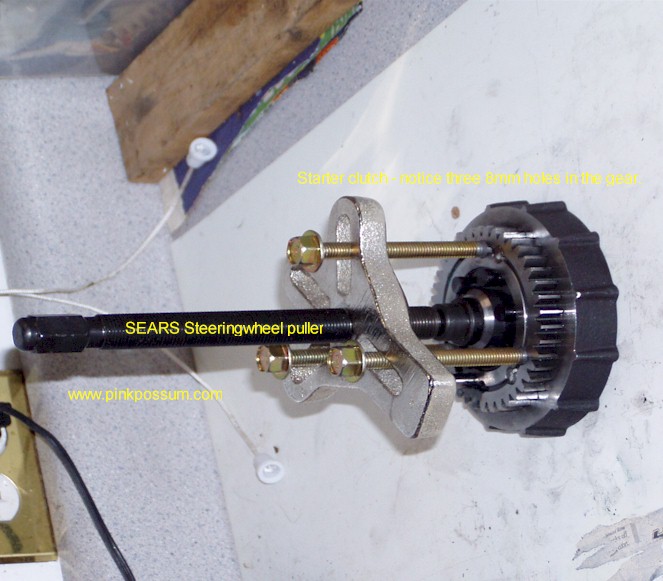
There are any number of pullers available. For this application, do not use one that slips behind the clutch to pull it. That will only end up damaging the clutch assembly.
The best puller is a small three legged puller. The one we used came from SEARS and is sold as a Steering Wheel puller. It's cheap, its strong and it pulls starter clutches off with ease.
 |
Reassembly
Make sure the two tapers are perfectly clean and undamaged because it is the taper that holds it all together - not the woodruff key. A little Loctite Blue on the threads is always a good idea and you can use a power tool to tighten it all up.
Alternator Rotor
The alternator is fitted on the right end of the crank and is retained with a bolt which passes through the rotor and into the threaded end of the crankshaft. Getting that bolt undone is easy enough - use an air tool or simply smack the wrench with a hammer in a counter clockwise direction. The sharp smack will crack it loose without damage to the crank or rotor - just be careful not to hit fingers or the rotor.
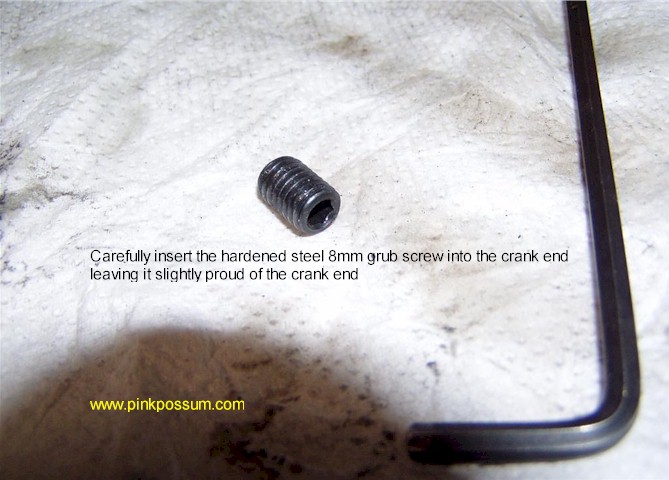
A nicely designed puller would be made of hardened steel and would last a couple of lifetimes, but I haven't got that long. The main thing here is to avoid damage to the rotor or crank end while applying a fair amount of brute force. The trick is to insert an 8mm grub screw into the crank end as seen below.
 |
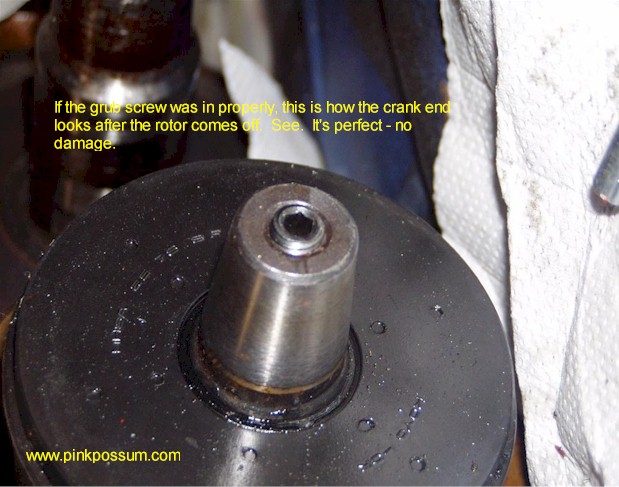 |
So far so good. We have protected the crank end from the brutality that follows.
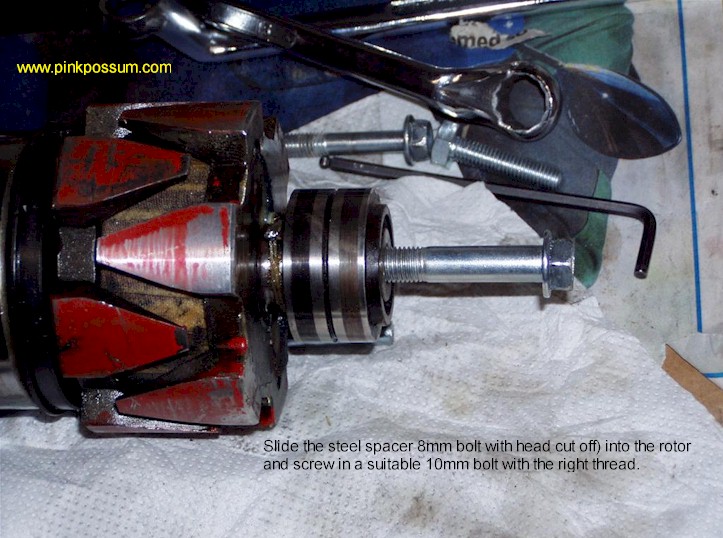
It would be easy to take a 10mm set screw ( a bolt with threads all the way) and screw it into the rotor. The problem is that the end of that bolt will spread like a mushroom and will be hard to extract later. So what we'll do is to take a suitable 8mm bolt and simply cut the head and threads off and slip it inside the rotor.
An alternative would be to take a nice tough socket head screw, cut the head off and cut a screwdriver slot in the end to screw it in by.
 |
 |
Now take a suitable 10mm bolt with the correct thread and screw it into the rotor until it bottoms on the spacer rod. Tighten that 10mm bolt until the rotor pops off. tapers frequently lock together and sometimes a little extra force is required to shock it loose. In that case, tighten teh 10mm extractor bolt down hard and then smack it straight on with a 2 pound hammer. If necessary, tighten the 10mm bolt a more and repeat. It rarely take more than 2 good blows to pop it off.
Caveat time: Do not accidentally strike you fingers or thumbs, or the rotor or other parts of the motor.